
Scripting
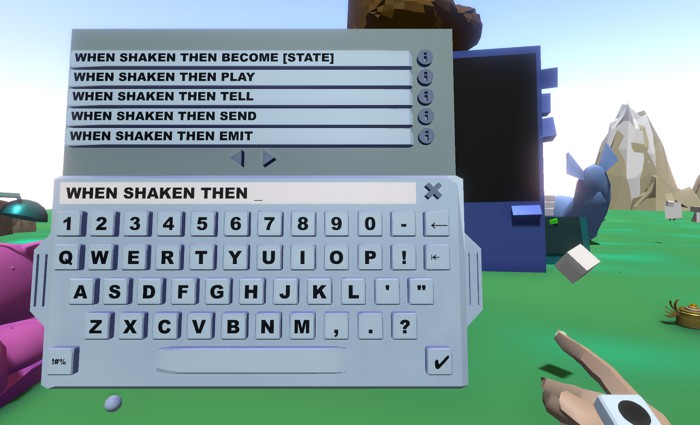
Anyland is a sandbox universe for VR & desktop (see Steam page), and scripts follow a straightforward syntax of
When something happens then do this
For instance
When shaken then play doorbell
Some commands contain additional tuning parameters, like
When touched then play doorbell with high-pitch 120% volume
You can also chain commands, like
When shaken then play laughter, emit bubbles
Each Thing can contain multiple Thing Parts, which in turn contain multiple States/ Cells (see glossary). For instance, if you had a bottle which when shaken should turn from blue to green, you could context-laser its body, and use "When shaken then become next in 1s", and for the second state, color it green. With this simple structure, and combined with messaging commands across Things, you can do just about anything you can imagine!
Scripts are always using auto-completion guidance, and you can click the info "i" next to each command from within Anyland to find out more.
Above video gives a general overview of scripting (if you jump to the start of the video, you'll get the general introduction to Anyland), and this page references all available commands.
When
When starts...
This event runs whenever that part loads. For instance, if you wanted a continuous ping-pong animation between two cells, you could use
Cell 1
When starts then become next in 1s

Cell 2
When starts then become next in 1s
To simplify, you can also always write "become next" instead of naming the cell number. It will then go to the next used cell, or back to the first cell if it hit the end of your used cells.
As opposed to some other events like "When touched", the "When starts" event is not always perfectly synchronized, as it triggers for different people at different times when they enter an area. It will however still be in-sync if something else (e.g. "when touched" from a previous cell) preceded its animation.
Generally, when you switch states, they'll auto-reverse after 30 seconds.
When touched...
This event triggers when a part is touched by e.g. a hand, body part, a held object, or another object that is thrown or emitted. For instance, you could make a doorbell object, then use:
When touched then play doorbell
If you want to have a Thing receive touches, but not normally collide, you can select its "..." → "..." → "Can pass through" setting (and make it invisible).
When touches [thing name]...
Similar to the generic "When touched", but this command also lets you specify a name you want to watch for. E.g. a door lock could use the following tell to open a door:
When touches red key 1 then tell open
You can also have the other object's parts, in specific states, have distinct names. For instance, you could have a torch whose main body is sometimes called "flame". Use the "call me" command for that.
When triggered...
A Thing Part is considered triggered when it is part of a Thing that's currently held, and one presses the trigger button on the controller (see the controls setup). Ensure that the Thing is a Holdable with "Remains Held" ticked for this to work.
As an example, you could use "When triggered" to make a lighter that shows a flame when pressed:
When triggered then turn on, play fire
If you currently move a leg with that hand/ controller, the triggering will go towards that attached leg Thing instead of the holdable.
To do something when the trigger action ends, use "When trigger let go" (which also covers leg movement trigger-stopping).
Alternatively, if you want a non-held object to react on press, see "When grabbed".
When neared...
This event fires when a person nears the object. Specifically, the distance is always measured from one's torso, to the center of the parent Thing creation, and everything within 3 meters is considered near. Use e.g.:
When neared then emit ceiling spear
Also see "When walked into".
When gets [name]...
This event happens when the part touches a held object; it will then take it (make it disappear). For instance, imagine a coin slot on a soda machine "getting" a coin from someone, to then emit a bottle from its bottom:
When gets coin then tell paid

Other part
When told paid then emit bottle
When told...
Thing Parts can send messages around to other Parts. For instance, maybe your light switch on a lamp needs to tell the light bulb to turn on:
When touched then tell pressed

Other part
When told pressed then turn on
"Pressed" can be any other string of your choosing (including multiple words, like "red button pressed").
Different types of tells have different reaches:
| Send | Receive | Scope |
|---|---|---|
| ... then tell [word] | When told [word] ... | Sends messages within that Thing only. |
| ... then tell any [word] | When told by any [word] ... | Sends messages across whole area. |
| ... then tell nearby [word] | When told by nearby [word] ... | By parts within 7.5m to the receiving Thing's center. |
| ... then tell body [word] | When told by body [word] ... | Sends a message from body parts to other parts of this body, and holdables. |
| ... then tell first of any [word] | When told by any [word] ... | Sends a message to the closest reacting other thing. |
| ... then tell in front [word] | When told by any [word] ... | Sends a message to all thing parts in front, at any distance. (Parts need to be collidable and may not use "Can pass through". Parts are messaged in order from nearest to furthest.) Turn on "..." → "Show direction" to visualize the forward direction. |
| ... then tell first in front [word] | When told by any [word] ... | Same as "tell in front", but stops after the first Thing Part ahead it hits (whether or not that part listens for the event). |
| ... then tell web [word] | AnylandTold(s, isAuthority) | Calls the JavaScript function AnylandTold() of this web page or a screen of this part's Thing. Authority is 1 person in the area. |
| ... then tell any web [word] | AnylandToldByAny(s, isAuthority) | Calls the JavaScript function AnylandToldByAny() web page or for any Thing in the area. Authority is 1 person in the area. |
When using "Tell Any", you may want to ensure the tell word is sufficiently unique, as otherwise e.g. a visitor to your area may accidentally trigger it with a holdable or so.
You can also use the Twitch Chat settings to connect to a live Twitch stream chat, where every chat line people type which is preceded by a "!" will turn that string into a tell to receive via "When told by any".
Automatic "told by body" events
There's a few automated "told by body" events you can listen to (they will be sent without you having to do anything):
| When told by body ... | |
| ... inventory opened left then ... | When the left hand opens the backpack. |
| ... inventory opened right then ... | When the right hand opens the backpack. |
| ... inventory closed left then ... | When the left hand lets go of the backpack again. |
| ... inventory opened left then ... | When the right hand lets go of the backpack again. |
| ... hand touches left then ... | When the left hand touches something. |
| ... hand touches right then ... | When the right hand touches something. |
| ... ping received ... | When a friend pings you from another area. |
| ... ping received from [person name]... | When a friend by that specific name pings you. |
| ... ping sent ... | When you ping someone else. |
| ... moving ... | When moving with the teleport laser (future support for desktop-mode moving may be added) |
| ... moving fast ... | When moving over 1.5 meter with the teleport laser |
| ... moving very fast ... | When moving over 3 meter with the teleport laser |
| ... someone was born ... | When someone launches Anyland for the very first time, and their birthday alert is sent around the area to random loyals. |
| ... someone arrived in area ... | When someone newly enters the area. |
| ... hand triggered left then ... | When someone starts holding the trigger on their left hand (also see "When triggered"). |
| ... hand triggered right then ... | When someone starts holding the trigger on their right hand. |
| ... hand trigger let go left then ... | When someone stops holding the trigger on their left hand. |
| ... hand trigger let go right then ... | When someone stops holding the trigger on their right hand. |
| ... both hands triggered then ... | When holding the trigger on both hands. This gets sent before the individual "left/ right triggered" body tell (for the second hand that starts the press). |
| ... dialog [optional name] opened left then ... | When no dialog (a hand menu) was open and any dialog is opened at the left hand now. See dialog names. |
| ... dialog [optional name] opened right then ... | When no dialog (a hand menu) was open and any dialog is opened at the right hand now. See dialog names. |
| ... dialog [optional name] closed left then ... | When a dialog on the left hand is closed and no dialog is open anymore. See dialog names. |
| ... dialog [optional name] closed left then ... | When a dialog on the left hand is closed and no dialog is open anymore. See dialog names. |
| ... jumping ... | When someone jumps in desktop/ keyboard mode. |
| ... hand touches hand ... | When your hand touches someone else's hand, like for a high-five or handshake. |
| ... left hand touches hand ... | When your left hand touches someone else's (left or right) hand. |
| ... right hand touches hand ... | When your right hand touches someone else's (left or right) hand. |
| ... consumed ... | When you eat something, that is, your mouth touches something which triggers "when consumed". |
| ... leg move started left then ... | When you start moving your left leg. |
| ... leg move started right then ... | When you start moving your right leg. |
| ... leg move ended left then ... | When you stop moving your left leg. |
| ... leg move ended right then ... | When you stop moving your right leg. |
| ... leg triggered left then ... | When someone starts holding the trigger on their left hand/ controller while moving their left leg (also see "When triggered"). |
| ... leg triggered right then ... | When someone starts holding the trigger on their right hand/ controller while moving their right leg. |
| ... leg trigger let go left then ... | When stopping to hold the left trigger while leg moving./em> |
| ... leg trigger let go right then ... | When stopping to hold the right trigger while leg moving. |
| ... context laser started left ... | When one starts pressing the left hand context laser. |
| ... context laser started right ... | When one starts pressing the right hand context laser. |
| ... context laser ended left ... | When one stops pressing the left hand context laser. |
| ... context laser ended right ... | When one stops pressing the right hand context laser. |
| ... flying ... | When one moves into air in Change Things mode or zero gravity. |
| ... deleting ... | When someone triggers the deletion action. E.g. on Vive, the grip button; on Valve Index + Oculus, the A button; in desktop mode, the middle mouse button; on a future device or hand tracking, another button or gesture. |
| ... deleting left ... | When someone triggers the deletion action using the left hand. This triggers before the generic "deleting". |
| ... deleting right ... | When someone triggers the deletion action using the right hand. This triggers before the generic "deleting". |
| ... deleting ends ... | When the deleting action ended. E.g. on Vive, when the grip button is let go. |
| ... deleting ends left ... | When the deleting action using the left hand ended. |
| ... deleting ends right ... | When the deleting action using the right hand ended. |
Dialog names
When using body tells to be informed of dialog opening and closing, you can use the following names, e.g. "When told by body dialog thing part attributes opened left then ...":
alert
approve body
area
area attributes
area copy credits
area filters
area placements
areas
body motions
browser
camera control
confirm
controllable
create
current and recent people
desktop camera
environment
equipment
find areas
forum
forum settings
forum thread
forum threadsearchresult
forum threadsettings
forums
forums search result
friends
get edit tools
gifts
highlight things
include thing
included sub thing
included sub things
inventory
inventory search words
joystick
keyboard
main
material
microphone
my size
own profile
pageable text
placed sub things
placement suppress
profile
question
settings
settings more
slideshow control
softban
start
sub areas
subdivide
thing
thing attributes
thing attributes more
thing copy paste
thing part
thing part attributes
thing part attributes more
thing part auto continuation
thing part copy paste
thing part screen settings
thing physics
thing tags
twitch chat
twitch guiding
twitch settings
vertex mover
video
video control
When consumed...
This event triggers when something is close to the mouth, like when an apple is eaten, or someone is drinking from a glass. (Note consuming does not require the object to be held, it may also something statically placed in the area.) Use e.g.:
When consumed then play munching, add crumbles, destroy
Alternatively, you can use:
When touches face then play munching, add crumbles, destroy
It triggers exactly the same, but may be preferable if the action is not meant to be about eating or drinking.
Some edible creations (like so-called Tele-Cookies or Tele-Oranges) are using the "microphone" attribute. This will cause the voice to be heard all across the area after eating the object. (It will also pop up a dialog reading "Everyone here hears you now (you can disable that via Me dialog, or switching areas).") Note amplified speech can be disabled via "... then disallow amplified speech".
When walked into...
This triggers when someone laser-transports onto. It also triggers when one walks near it at a radius of 2 meters from one's torso to the center of the Part's parent Thing. For instance, you could script a platform on the floor which when stepped into opens a door in front (like by using a "tell" to that door). Or it could directly send the person to another area:
When walked into then send one nearby to buildtown
Also see "When neared", which triggers right after "When walked".
When pointed at...
When someone points the index finger at this part. For instance:
When pointed at then say hello
The maximum distance for this to work from finger tip to Thing part is 10 meters, and this event is checked every 0.5 seconds.
Also see "When looked at".
When looked at...
When someone looks at this part, facing their head direction towards it. E.g.:
When looked at then play voice giggle, become next in 1s
The maximum distance for this to work from head to Thing part is 10 meters. This event is checked every 0.5 seconds.
Also see "When talked to".
When taken...
This triggers when a Holdable or Movable is picked up with a hand. For example:
When taken then play horror whoosh, tell any the statue was taken
Also see "When grabbed".
When grabbed...
This event triggers when a statically placed Thing's Part is touched and the trigger is pressed. For instance, you could use this for a door knob, which using a tell to the door hinge then opens the door Sub-Thing.
When shaken...
This triggers when a Holdable is wildly shaken when held. For instance, you could create a soda can that bursts open when shaken, or create a magic wand that results in particle effects upon heavy waving.
When talked from...
This event fires for any Thing Part of a head attachment when that person speaks into their microphone. This is useful for e.g. creating mouth animations, as you only want the lips to move when one speaks.
When talked to...
This happens to the object if one looks at it, then speaks something. For instance, you could have a being in the world (NPC) react to people trying to talk to it.
As with the "Looked at" event, this is checked every 0.5 seconds, at a distance of up to 10 meters.
When blown at...
This triggers when one blows at something, or technically speaking, when one makes a sound above a certain volume while the mouth is near the Part. For instance, you could use this to let someone blow out a candle, blow up a balloon, or play an instrument like a trumpet:
When blown at then turn off

When blown at then play air pump short

When blown at then play trumpet b 4
(The event is checked for every 0.1 seconds.)
When turned around...
This happens when a Holdable is turned upside down, e.g. someone wants to empty a bottle.
When high speed...
This triggers whenever a Holdable is held and moved at a high speed.
When let go...
This triggers when a Holdable or Movable is dropped again.
When raised...
This triggers when a Holdable is raised up in the air. Specifically, it looks for the hand's upwards velocity crossing a certain threshold.
Also see "When lowered".
When lowered...
This triggers when a Holdable is lowered. Specifically, it looks for the hand's downwards velocity crossing a certain threshold.
Also see "When raised".
When hit then...
When this part is hit by something at high speeds.
A normal "When touched" is always triggered after this event, too.
When hitting [thing name] then...
When hitting or being hit by something of that name at high speed. For instance:
When hitting metal then play lightsword hit 4
A normal "When touches [thing name]" is always triggered after this event, too.
See the "Call me" command to change a hitter part's name.
When someone in vicinity...
When a person gets in the vicinity of 7.5 meters of this part, measured from the person's torso center to the Part's parent Thing center.
Also see "When someone new in vicinity".
When someone new in vicinity...
When a person gets in the vicinity of 7.5 meters of this part for the first time during that area visit. The distance is measured from the person's torso center to the Part's parent Thing center. This command is useful to trigger something only once.
Also see "When someone in vicinity".
When touch ends...
When something stops touching. E.g. a hand just ended its tap of a table surface, or an object stops colliding with another object.
To catch the start of a touch, see "When touches".
When trigger let go...
This event fires for a held object when the trigger is let go again. Make the Holdable of the "Remains Held" type if you want to use this command.
For the trigger start even, see "When triggered".
When destroyed...
When a Thing and its Parts end their lifetime, like a thrown mug shattering on impact.
When any part...
Using the "any part" prefix for events, like "When any part touches...", will apply the command and its results equally across all parts of the Thing (including its Sub-Things). This can save you from having to script the same command for many Parts of a Thing.
Also see "When any state".
When any state...
Using the "any state" prefix for events, like "When any state touches...", will apply the command and its results equally across all states of this current Thing Part. This can save you from having to script the same command for many States of the same Part.
Also see "When any part".
When hears [speech]...
This allows your objects to listen to speech commands, or conversation starts. For instance, a computer terminal could react to the word "restart", or an NPC to the word "Hello".
When the object is placed, this command works at a radius of 7.5 meters from a person's head towards the center of the Part's parent Thing. When the object is attached, it triggers when oneself is speaking.
This command relies on Windows speech recognition to work in Anyland. It is (unfortunately) a known issue that it won't trigger on some systems.
When enable/ disable setting...
This event fires when a certain Anyland setting is set or unset, like one deactivates the microphone. (It works both when a setting is toggled via a dialog, or via a script itself.)
The following settings are available:
|
When enable setting... When disable setting... |
|
|---|---|
| ... microphone | Whether the microphone is active. |
| ... see invisible | Whether one can see invisible as editor. |
| ... touch uncollidable | Whether one can touch uncollidables as editor. |
| ... lower graphics quality | Whether graphics quality is lowered to improve performance. |
| ... fly | Whether one can fly as editor. |
| ... findable | Whether one's current area is shown in the friends list. |
| ... stop alerts | Whether during creation, angles snap. |
| ... snap angles | Whether during creation, angles snap. |
| ... soft snap angles | Whether during creation, angles soft snap. |
| ... snap position | Whether during creation, positions snap along an axis. |
| ... scale all parts | Whether during creation, all parts scale uniformly together. |
| ... scale each part uniformly | Whether during creation, each individual part scales uniformly. |
| ... finetune position | Whether during creation, movements are finer. |
| ... symmetry sideways | Whether sideways-symmetric parts should be added. |
| ... symmetry vertical | Whether vertically-symmetric parts should be added. |
| ... symmetry depth | Whether depth-symmetric parts should be added. |
| ... show grid | Whether a grid is shown in the area for more precise building. |
| ... snap things to grid | Whether placements snap to the grid for more precise building. |
| ... snap thing angles | Whether generally, placement angles snap (overriding thing settings). |
| ... snap thing position | If generally, placements move on an axis (overriding thing settings). |
| ... ignore thing snapping | Whether generally, placement thing snappings will be ignored. |
| ... extra effects in vr | Toggles extra effects in VR (may lag; needs one to be over 1 day old). |
| ... lock angles | Whether to fully have rotation locked for editing. |
| ... lock position | Whether to fully have position locked for editing. |
When typed...
When text was typed. Can be attached and used with the "then say [typed]" command.
When is...
When a scripting variable value changes, including when that value is initiated during area load. Use e.g. "When is somevalue >= 2 then ...". You can also combine this with other events, e.g. "When touched and is somevalue >= 2 then...".
Here are some more examples:
| When is... | |
|---|---|
| somevalue >= 2 | When the value named "somevalue" of this thing is equal or over 2. "Somevalue" can be any name you choose. |
| somevalue = 2 | When the value named "somevalue" of this thing is equal or over 2. "=" and "==" both mean equal. |
| somevalue == 2 | When the value named "somevalue" of this thing is equal or over 2. "=" and "==" both mean equal. |
| area.somevalue == 2 | When the area value named "area.somevalue" reaches 2. |
| somestate | When value "somestate" is true/ not 0 (you can also use "not somestate"). "Somestate" can be an name you choose. |
| value >= 2 and state | When all of these are true. |
| value >= 2 and not state | Use "not" to check for a value being untrue. |
| value >= 2 or state | When any of these is true. |
| value != 2 | A check for unequal (the same as "<>"). |
| value <> 2 | A check for unequal (the same as "!="). |
| value < 2 | A check for "lower than". |
| value > 2 | A check for "larger than". |
Then
... then become [state]
Switches from the current to another State/ Cell. For instance, you could have two different animations state, like:
1. The cube is green and small
2. The cube is blue and big
When now using the command
Cell 1
When starts then become next in 1s

Cell 2
When starts then become next in 1s
... then the cube would smoothly transition from green to blue (and small to big) and back in an endless loop in the rythm of 1 second.
You can use different options for the "become" command:
| become next in 1s | Flips to the next state in 1 second. If the end of used cells are reached, it goes back to the first again, so you can always safely use "next". Note the "s" at the end of the number is always optional. |
| become next in 5.5 | Use floating point digits, like 5.5 seconds. We decided to omit the optional "s" from the number here. Note the default max state length is 30 seconds (unless you're currently editing the part and have its menu open, then it will remain). You can however tick a Part's "..." → "Persist States" option to have its state not revert (until everyone leaft the area). |
| become previous in 1s | Goes to the previous cell (or the last used one, if the current cell is already 1). |
| become next | Using no time will (almost) instantly switch to the next state |
| become 2 in 1s | Flips to the state of the provided number, like 2. |
| become untweened next in 1s | Avoids any transitioning animation. For instance, if you go from a small cube in cell 1 to a big cube in cell 2, it would not show all the intermediate sizes, but instantly jump from small to big at the provided time (like 1 second, in this case). |
| become unsoftened next in 1s | By default, all transition animations are softened at the beginning ("Ease-In tweening") and end ("Ease-Out tweening"). By using the "unsoftened" keyword, you make the animation steady instead, avoiding all easing. Outside of scripting, you can also use the setting "Unsoftened animations". |
| become soft start next in 1s | This avoids just the Ease-In for the animation tweening. |
| become soft end next in 1s | This avoids just the Ease-Out for the animation tweening. |
| become 3 via 2 | The "via" command uses another intermediate state to animate with, for curvier movement. For instance, maybe you want a robot to float across the area from point A to B (cell 1 to 3), but you want it to make a bit of a curve (the curve being defined by the position of cell 2). This keyword is combinable with other options for the "become" command, but needs to be written last. |
| become current in 1s | Goes again to the current state, restarting it at the provided time. This can be used along with the "When any state" command. |
... then play
Plays a sound of the given name, e.g.
When touched then play doorbell
Optional parameters can be used with sounds, and are often combinable with each other (and in any order), like
When touched then play doorbell with echo 50% low-pitch
These are all the sound options:
| When touched then play [sound name] with | 50% | Plays the sound at a given volume percentage. Appending the word "volume" is optional. You can use any number from 1-500, and can include floating point numbers like 100.5%. The "%" symbol can be omitted if you want. |
|---|---|---|
| very-low-pitch | Plays the sound at a very low pitch (of 0.5). | |
| low-pitch | Plays the sound at a low pitch (of 0.75). | |
| high-pitch | Plays the sound at a high pitch (of 1.5). | |
| varied-pitch | Plays the sound at a slightly varying pitch (the maximum variance is 0.1). | |
| very-varied-pitch | Plays the sound at a strongly varying pitch (the maximum variance is 0.3). | |
| -1.0 octaves | Changes pitch by an octave. Use e.g. -1 to decrease by an octave, 1 to increase by one, or fractions like 0.26. (The "s" in "octaves" is optional.) | |
| echo | Plays the sound with an echo effect. | |
| low-pass | Filters the sound to only allow low frequencies. | |
| high-pass | Filters the sound to only allow high frequencies. | |
| stretch | Stretches the audio. | |
| reversal | Plays the audio backwards. You can combine this with other options, but it will ignore pitch settings. | |
| 5 repeats | Repeats the sound that many times (up to 50). You can use either the word "repeat" or "repeats". "1 repeat" means the sound will be played twice altogether. | |
| 0.5s delay | Adds a pause of that many seconds before the sound starts. (The "s" next to the number is optional.) | |
| 0.5s skip | Omits this many seconds from the audio's start. (The "s" next to the number is optional.) | |
| 0.5s duration | Sets after how many seconds the sound is stopped. (The "s" next to the number is optional.) | |
| surround | This will have the sound play at its normal volume at any distance across the area. Also see the Thing's "..." → "Surround Sound" setting. As distant objects are sometimes not showing (for optimization reasons), you may additionally want to use the Thing's "Show if far away too" setting. |
→ A full list of sounds is available. Thanks to all Creative Commons & more sound makers!
... then tell
This sends a message to another part. For instance, a light switch may message a light bulb so it can turn itself on, or a door knob may inform the door hinge to open the door upon touch. The following sends the message "pressed" (note you can use any other word) to a doorbell object which then plays a sound:
When touched then tell pressed

Other part
When told pressed then play doorbell
To tell something to any part in the area, and not just parts of the same thing, use:
When touched then tell any pressed

Other part
When told by any pressed then play doorbell
→ See the full When Told/ Then Tell reference for more.
... then send
The "send nearby" or "send all" command sends people to another area, or a specific named marker in the current or another area. For instance:
When touched then send nearby to buildtown
Note for this command to work, it needs to be called from a placed object in the area, or an attachment to the body.
The following variants are available:
| When [some event] then ... | send nearby to [area name] | Sends all people nearby to the area of a given name, e.g. "When touched then send nearby to buildtown". Nearby here means a distance of up to 2 meters from a person's head to the closest point on the surface of the Thing Part. |
|---|---|---|
| send nearby onto [thing name] | Like "send nearby to", but will transport one onto a marker in the area by that name. For instance, you could place an invisible flat cube at the ground and name it "marker1", then use the command "When touched then send nearby onto marker1". (If multiple markers of the same name exist, the closest one will be used.) | |
| send nearby to [area name] onto [thing name] | Applying both "send nearby to" (to transport to an area) and "onto" (to transport onto a marker, see "send nearby onto" above). | |
| send one nearby to [area name] | Similar to "send nearby to", but will only trigger for the closest person, or the person who performed the relevant action, e.g. pressed the button that caused this command. | |
| send one nearby onto [thing name] | Similar to "send nearby onto", but will only trigger for the closest person, or the person who performed the relevant action, e.g. pressed the button that caused this command. | |
| send all to [area name] | Transports everyone in the area to another area, e.g. "When touched then send all to buildtown". | |
| send all onto [thing name] | Like "send nearby onto", but transports everyone in the area to that marker. | |
| send nearby onto [thing name] at 45 degrees | Add a degrees value from -360 to 360 in steps of 45 to specify the rotation the person should get after being transported. Please note this is currently in addition to the rotation a VR user may have within their room setup, so it may unfortunately at the moment not always end up facing as wanted. | |
| send [one] nearby to previous | Transports one back to the previously visited area (while skipping "via" transit areas). | |
| send [one] nearby to current | Transports one to the current area, useful e.g. when combined with "via". | |
| send [one] to [closest held] | Transports one to an area by the name of the closest held thing, if any. This can be used with e.g. dynamic travel ticket systems. The value for [closest held] is a placeholder which is dynamically replaced when holding the object. |
... then emit
Emits another Thing from this part, in the part's direction. For instance, a gun Holdable may use
When triggered then emit bullet
Note you don't type the word "bullet"; instead, once you selected the "emit" command, you can drag & drop an item from your inventory. This will then auto-fill its name (and possibly add a number, like "bullet 2", if there's more than one object of that name being used in the Thing already).
More options can be added. The following sets the emission speed from 0-100% (the "%" is optional)
When triggered then emit balloon with 10%
And this option (combinable with the speed setting or used on its own) makes the emitted object fly off with no gravity:
When triggered then emit vase gravity-free
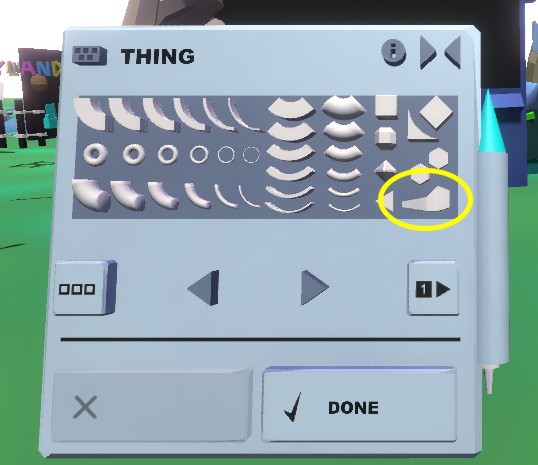
You can visualize the direction of a part by choosing the Thing's "..." → "Show center + direction" setting. One Base Shape especially helpful to understand forward (and upward & sideways) directions is the one pictured, for which you can also use the "Invisible (when done)" (and "Uncollidable") setting.
... then loop [name]
This commands starts a looping sound, e.g. a waterfall in a nature scene. Up to 5 loop sounds can be used simultaneously in the area. Use for instance
When someone in vicinity then loop water
You can optionally set the volume by providing a percentage (the "%" can be omitted from the number if you want; use values of up to 500.0):
When someone in vicinity then loop water with 80%
Looped sounds can also be made heard in the whole area by either setting the Thing "..." → "Surround Sound" attribute, or using the "surround" with-keyword:
When starts then loop winter wind with surround
You can also get a mix between local 3D spatial sound + whole-area surround sound via the "half-surround" keyword. It will give some indicator of direction and distance while still being heard everywhere:
When starts then loop winter wind with half-surround
The placements distance optimizer will always ensure Surround Sound things are active.
To stop the loop again, use "end loop".
The following loop sounds are available:
air fade
alarm
alarm 2 - 11
birds
birds 2
bubbles
bubbles 2
chanting
chatting crowd
chatting crowd 2
computer
crying voices
crying voices
diesel engine
f plus quint
fire
future ambient
future ambient 2 - 3
future ambient 3
glimmer
heartbeat
horror music
hum
hum 2 - 5
machine
machine 2 - 7
music street ambient
mystical aura
mystical aura 2
noise
om
orchestra
rain
retro computer
scary violins
strange ambient
unmusic
wall of sound
water
water 2
wind
wind 2
amazonia farm
arcade air hockey
auto interior freeway
boat slosh
bubbling fan
caves ambient
cheering crowd
city autos
city autos 2
city rain
city rain 2
city voices
coastal docks
coastal restaurants
cockpit ambience
computer room
construction site
countryside birds
desert ambient
diesel train
eerie ambience
eerie cave
eerie synth
electro magnetic
evening cricket
exhaust buzz
fair crowd
ferry metal
ferry rattle
freightliner wagons
furnace ambient
hall crowd
harbor seagulls
heavy fan
heavy interference
heavy winds
heavy winds 2
helicopter
helicopter 2
hologram ambience
industrial ambience
industrial ambience 2
jet ambience
jungle ambient
lake waves
magical water
mall crowd
metallic ball rolling
motor drive
motor drive 2
mountain sheep
mountain stream
multiverse interaction
nature birds insects
outside ambience
park people
park wind
pedestrian street
planet rumble
propeller airplane
propeller airplane 2
radiation planet
rain on auto
rain on concrete
room tone
sea between rocks
sea between rocks 2
seaplane
seaplane 2
seawash
seawash heavy
singing bowl
singing bowl 2
steam train
subway line
synth ambience
synth ambience 2
tank drive
train station
transit train
transit train 2
typewriter ambience
ultraviolet rays
underwater ambience
underwater lava
vacuum suction
wavering soundscape
whirring ambience
wind distant traffic
winter city streets
winter pedestrians
winter wind
Note there's also global area environment/ weather settings, some coming with their own background sounds. Open the Area dialog (the mountain & sun icon) to set them. As opposed to such environment sounds, the loop command sounds will have the 3d audio source be from the Thing Part itself, the volume shrinking as one gets further away.
... then end loop
This command ends this Part's currently playing loop sound again.
... then call me
Gives a name to this Thing Part within this State. For example, when you have a sword Thing with both grip and blade Parts, you may want to use on the blade Part
When starts then call me blade
Once done, other objects could then use "When touches blade then ..." to check for blade collisions specifically (ignoring mere grip touches from this sword).
... then give haptic feedback
Provides a haptic buzz feedback for the VR controller. This can be used by arm attachments or currently held Holdables. In non-VR desktop/ keyboard mode, this results in a sound effect.
People can optionally disable any haptic pulse via the Me → "..." → More → "Lock Features" settings.
... then let go
This command drops this item if it's a currently held Holdable.
... then all parts
Use the "all parts" prefix to do something with the whole parent Thing, like:
When starts then all parts face someone
You can optionally use "stop all parts" to stop it again.
The following "all parts" commands are available:
| When [some event] then all parts ... | face someone | Rotates the whole Thing towards the head of the closest person. |
|---|---|---|
| face someone else | Rotates the whole thing towards the head of the second-closest person. | |
| face up |
Rotates the whole thing upwards. To best understand forward, sideways and upwards directions of a part,
you can use the specific base shape pictured.
|
|
| face empty hand | Rotates towards the closest empty hand. | |
| face empty hand while held | Rotates towards the closest empty hand while being held. | |
| face nearest [thing name] | Rotates towards the closest thing of that name. (Can be combined with Sub-Things to make for very interesting creations, including inverse-kinematic arms!) | |
| face nearest [thing name] lock [local] [xyz] | Same as "face nearest", while locking the world or Thing-local coordinates during the rotation. E.g. "lock x", "lock local z", "lock xy", "lock x lock y". | |
| face view | Rotates the thing towards the view of the eyes/ default camera. (This can be combined with image-textured quad base shapes for certain lightweight decorative parts of an area.) |
... then stop all parts
Undoes something you started with "then all parts", e.g. "When shaken then stop all parts face someone".
| When [some event] then stop all parts ... | face someone | Stops rotating towards closest or second-closest person. |
|---|---|---|
| face empty hand | Stops rotating towards the empty hand. | |
| face up | Stops rotating the whole thing upwards. | |
| face nearest | Stops rotating towards the closest thing of a name. | |
| face view | Stops rotating towards the view of the eyes/ default camera. |
... then destroy
You can destroy the whole parent Thing of this part by using e.g.
When touched then destroy all parts
You can also destroy other things nearby at a given radius to their surfaces, like
When touched then destroy nearby
You can add an optional "with" parameter to destructions, like
When touched then destroy all parts with bouncy burst
The following "with" parameters are available:
| When [some event] then destroy [all parts/ nearby] with ... | burst | Destroys the thing by breaking it into parts. |
|---|---|---|
| [burst] 10 force | Applies a burst force from 0-1000. | |
| [burst] gravity-free | Applies zero-gravity to the burst effect. | |
| 30s restore | For placements, restores the thing after the given amount of seconds (from 0.01 - 86400.0 seconds; adding an "s" to the number is optional). | |
| [burst] 50 parts | Sets the maximum number of parts to break into, from 1 - 250 (the default is 30). | |
| 5 grow | Breaks into growing parts at a given speed from 0.01 to 100.0. | |
| 5 shrink | Breaks into shrinking parts at a given speed from 0.01 to 100.0. | |
| 10s disappear | The seconds after which burst parts start to disappear, from 0.1 to 60.0 (the default is 12.5). | |
| bouncy | Makes burst parts bounce on collisions. | |
| slidy | Makes burst parts slide on collisions. | |
| uncollidable | Makes the burst parts pass through objects. | |
| self-uncollidable | Makes the burst parts pass through each other. | |
| radius | The destruction radius for the "destroy nearby" variant. Default is 2 meters. | |
| max-size | The size limit at which things still get destroyed. Default is 0.2 meters. |
Use "... then reset area" to undo all deletions in the area again.
... then propel forward
When emitted or thrown, it moves the thing forward:
When starts then propel forward
You can add an optional force in percent from -100% to 100% (the default is 10%, and 0% stops):
When starts then propel forward with 50%
Also see "rotate forward".
... then rotate forward
When emitted or thrown, it rotates the thing forward-wise:
When starts then rotate forward
You can add an optional force in percent from -100% to 100% (the default is 10%, and 0% stops):
When starts then rotate forward with 50%
Also see "propel forward".
... then allow/ disallow
This command toggles certain rights in the area. This command needs to come from a placement, to verify it's wanted by someone with editor rights. For instance, you can use the following to allow any non-editor to grow to any height in your area (independent of normal default limits):
When someone new in vicinity then allow any person size
The following undoes this right again:
When someone new in vicinity then disallow any person size
The following rights commands are available:
| When [some event] then [allow/ disallow] ... | emitted climbing | Allows teleporting onto thrown or emitted things. | Default: Allowed |
|---|---|---|---|
| emitted transporting | Allows thrown and emitted things to send people to areas/ marker locations. | Default: Disallowed | |
| moving through obstacles | Allows anyone to put their head into objects and still see and move, even when not in Change Things mode. This allows one to e.g. peek through walls and doors, or walk through them. | Default: Disallowed | |
| vision in obstacles | Allows seeing & moving in obstacles if one somehow happened to get their head inside one. Note disabling this will turn on a different approach to wall guarding which may sometimes cause accidentally getting the head stuck & vision covered. | Default: Allowed | |
| invisibility | Hides one's body spheres & name tag in the area (a disclaimer will be shown, for privacy information reasons). | Default: Disallowed | |
| any person size | Allows non-editors to resize like editors, up to 2500% instead of the normally allowed maximum of 150%. (The minimum shrinking size on the other hand is always the same for editors and non-editors, at 1%.) | Default: Disallowed | |
| highlighting | Allows non-editors to highlight certain things via the Area Highlight dialog. | Default: Allowed | |
| amplified speech | Allows speech volume amplifying (including using edible microphones). | Default: Allowed | |
| any destruction | Allows placements in this area to be (temporarily) destroyed via the "destroy nearby" command. | Default: Disallowed | |
| web browsing | Allows people to show web pages on screens in the area. | Default: Allowed | |
| untargeted attract and repel | Allows "set attract/ repel" commands even when they don't use specific name filters (or use name filters below 3 letters). | Default: Allowed | |
| build animations | Allows one to see any placement as a build animation via the backside of the Thing context dialog. This temporarily hides the placement, so could be used to peek behind walls (though it will keep the collision even during that time, so won't allow passing through). Note area editors will always be able to start build animations. | Default: Allowed |
All current rights are shown at the back of the Area dialog (click on your ring menu, then the mountain & sun button, to open that dialog).
... then show
This command can show a variety of different things, from videos to forum threads or name tags. For instance, to display the name tags of everyone in the area again for a while, use:
When touched then show name tags
The following "show" commands are available:
| When [some event] then show ... | board [board name] | Shows an Anyland in-world forum main page of that board's name, e.g. "When touched then show hangout". (You can optionally create your own custom boards, including area guestbooks or mailboxes.) This command requires placement or attachment, and one's action (e.g. touch), to trigger. |
|---|---|---|
| thread [link] | Opens a forum/ board thread for that link. You can copy the link from the backside of thread dialogs. This command requires placement or attachment, and one's action (e.g. touch), to trigger. | |
| video controls | Shows the controls dialog for the closest nearby video screen. | |
| camera controls | Shows the controls dialog for the closest nearby camera. | |
| slideshow controls | Shows the controls dialog for the closest nearby slideshow screen. | |
| video [url] | Plays the YouTube URL pasted (you can also copy it from the video controls dialog backside). Optionally add e.g. "with 0.15%" to adjust the volume. | |
| web [url] |
Loads that URL in a browser on the nearest screen.
Note Anyland can communicate with the page using
special JavaScript commands like AnylandTell(text).
Note for Gifs, you can use the optimized enlarger URL like http://anyland.com/gif/?url=example.com/some.gif (paste your link into the Browser dialog to have it be auto-converted, ready for copying). You may use the additional parameters "width", "height", and "top" to set pixels, and "link" to define a URL for when the image is clicked. |
|
| web [url] with 200% zoom | Like the normal "show web [url]" command, but setting a certain zoom size in percent. The percentage can be anything from 1 - 1000, and the "%" is optional. (These with options are combinable, e.g. "with navigation-free 200% zoom.) | |
| web [url] with navigation-free | Like the normal "show web [url]" command, but disallows editing the URL, paging back & forward, or switching to videos. | |
| web [url] with cursor-free | Like the normal "show web [url]" command, but hides the cursor and removes the ability to click into the browser. | |
| web [url] with unsynced | Like the normal "show web [url]" command, but won't synchronize URL changes between people around. For instance, if the screen starts with "example.com", and one person clicks on a link on it that changes it to "example.com/foobar" for them, then another person around will still see "example.com". | |
| chat keyboard | Lets you enter a text chat line. | |
| line | Shows a line from the thing's center to this part. | |
| line with 0.1 width | Like "show line", but setting a line width from 0 to 10 (the default is 0.01). | |
| line with 0.1 start-width | Like "show line", but setting a start point line width. | |
| line with 0.1 end-width | Like "show line", but setting an end point line width. | |
| line with 0 width | Setting any width to 0 removes the line again. | |
| name tags | Shows people's bottom name tags again for 30 seconds. | |
| name tags 100s | Shows people's bottom name tags again for that many seconds (for up to 86400 seconds). | |
| areas [search] | Opens an area search results dialog for your provided keywords. This command requires placement or attachment, and one's action (e.g. touch), to trigger. | |
| inventory | Opens one's inventory. This command requires placement or attachment, and one's action (e.g. touch), to trigger. |
... then do creation part/ all creation parts
Use this command to change the appearance of a creation while you're editing it. The following for instance rotates the currently selected part:
When touched then do creation part rotate local 90 0 0
To apply a command across all parts of the currently edited thing, you can use e.g.:
When touched then do all creation parts rotate local 90 0 0
The following command options are available:
| When [some event] then do creation part/ all creation parts ... | move 0.0 0.0 0.0 | Moves a part's x y z coordinates relative to the world. |
|---|---|---|
| move [local/ random] 0.0 0.0 0.0 | Moves a part's x-y-z coordinates. Add "local" to move relative to itself instead of the world, and/ or "random" to move randomly by that amount. | |
| rotate [local/ random] 0.0 0.0 0.0 | Rotates a part's x-y-z coordinates relative to the world. Add "local" to rotate relative to itself instead of the world, and/ or "random" to rotate randomly by that amount. | |
| scale local [random] 0.0 0.0 0.0 | Scales a part's x-y-z coordinates relative to itself. Add "random" to scale randomly by that amount. | |
| color [random] 0 0 0 | Adjusts the red, green and blue values from 0-255. Add "random" to randomize the color. | |
| saturation 0.0 | Adjusts the color saturation from 0.0 - 1.0. | |
| hue [random] 0.0 | Adjusts the color hue from 0.0 - 1.0. Add "random" to adjust the hue randomly. | |
| lightness 0.0 | Adjusts the color lightness from 0.0 - 1.0. | |
| duplicate [local/ random] 0.0 0.0 0.0 | Copies & moves to the x-y-z coordinates relative to the world. Add "local" to move relative to itself instead of the world, and/ or "random" to move randomly by that amount. | |
| material [material name] | Sets to the material of the given name, e.g. "very metallic" or "transparent glossy". The names follow the format as listed in the Thing Format reference. | |
| become 1 | Sets to a given state/ cell number (if that state exists). | |
| become stopped 1 | Sets to a given state/ cell number (if that state exists), but won't trigger that state's "When starts" event. | |
| insert state | Inserts a new cell after the current one. | |
| remove state | Removes the current cell, unless it's the last remaining one. (Note you can also remove a cell by pressing delete on your controller while the part dialog for that cell is opened; you will need to confirm the delete.) | |
| undo | Reverts the last action, if any. |
... then go to inventory page [number]
If the inventory is currently open, this command moves to page 1 - 100 in it. For instance:
When touched then go to inventory page 42
If you use this command on an object that you then place into the inventory, it allows you to create a custom backpack paging interface.
... then add crumbles
This command will show crumbles falling off this part, e.g. when biting into a bread, or hacking a tree with an axe:
When consumed then add crumbles
Optionally, you can have the crumbles fall off of all parts of this Thing:
When consumed then add crumbles for all parts
... then type [text]
During creation editing, this will add the given text line (written in quotes) to a part script. This allows you to automate certain script lines, or parts of lines, that you repeatedly write, e.g.:
When touched then type "When consumed then become next in 5s"
... then set speed
Sets the speed of emitted or thrown things. Numbers range from -1000 to 1000. Use a single number like this:
When starts then set speed 20.0
Or use 3 numbers for x-y-z, like:
When starts then set speed 0 50 -10.5
Also see "add speed".
... then set constant rotation
Sets an ongoing x-y-z rotation for this part in degrees per second (without the need for it to be emitted or thrown), like:
When starts then 0 -20.5 0.
The rotation only starts once the object is saved, it will remain static while you're still editing.
For this command it can help to tick "Show center + direction" in the Thing's "..." option.
... then set snap angles to
Allows you to use a custom snapping value. The command needs to be triggered from a part that's attached to your body. Use e.g.:
When touched then set snap angles to 45
The normal angle snapping (when set from the backside of the Create dialog) is 90, the soft angle snapping is 22.5. Note your custom value will reset upon changing to another area.
To reset the value again to the current default snap settings, use:
When touched then set snap angles to default
... then set camera
Sets the desktop view camera positioning method, and how it follows. Use e.g. this to set the positioning method:
When touched then set camera position to optimized view
The positioning methods are the same as in the camera settings dialog (reachable from your Me menu) and can be any of the following:
default
optimized view
view from behind
view from further behind
bird's eye
looking at me
left hand
right hand
While "default" mirrors a VR rendering straight to the desktop, "optimized view" does some optimizations that provide a better view, more closely resembling what you in VR would see. It can be a good setting if you want to stream for others or make a recording. It does take a separate rendering, though, so may not be as fast as the "default" view.
To set the type of camera following, use e.g.:
When touched then set camera following to smoothly
The available following methods are again the same as in the camera settings dialog:
default
smoothly
very smoothly
none
"Default" follows directly, without any smoothing, so there may be some shaking when using this in desktop recordings or streams (but it also won't require a different camera render, so it can be very fast). The "none" option makes the desktop view camera remain statically at whereever it was when you picked the setting, it won't follow at all.
... then set gravity to
Sets the area's gravity. Use 3 numbers for x-y-z (the default is 0 -9.81f 0, and each value can range from to -1000 to 1000):
When starts then set gravity to 0 -3.5 0
To reset the gravity back to the default, use:
When starts then set gravity to default
... then set area visibility to
Limits the distance at which Thing placements can be seen to this many meters, like:
When starts then set area visibility to 15m
Distance is measured from one's head to a Thing's center. The minimum value you can use is 2.5, and the "m" is optional. Things using the "Show if far away too" settings are exempt. (Note large values do not increase visibility.)
The following resets this setting again:
When starts then set area visibility to default
... then set person as authority
This makes one (the person who interacted to trigger this command) the synchronization authority. This command needs a placement or editor attachment. Use e.g.
When touched then set person as authority
By default, the sync authority is always automatically handled. It will be whoever is in the area longest, switching around as people come and go. With this command you can specify who in particular is the authority; for instance, maybe you have a pinball game where the ball is using the "Stricter physics syncing" option. For smoothest physics visuals for the current pinball player, you may then set them to be authority.
... then set quest
This handles the achieving of Quests. Quests are mini-adventures or challenges where something at the end can be achieved, and achieving it is noted in forum threads. For instance, maybe you want to hand out a sceptre at the end of a dungeon, and everyone winning it will be noted in your dungeon's forum.
Quests are always started by reading board thread-starter comments that contain the text "[quest: someareaname - somequestname]", e.g. "[quest: dungeon - king sceptre]" (including the square brackets). Now that particular area, like in this case one named "Dungeon", can have a placement with this command to achieve the quest:
When touched then achieve king sceptre
... where "king sceptre" is the name of the quest, as defined in the forum thread.
You can also set to unachieve a quest (this marks it as still running, but unachieved again), as well as to fully remove it. Use e.g. the following if the quest was named "win boss battle" (and again it's important that the command runs from a placement of the area which was defined in the forum thread):
When touched then unachieve win boss battle

When touched then remove win boss battle
For some example quests, have a look at the Anyland in-world "Quests" board.
... then set attract/ repel
You can have thrown or emitted items be attracted to this part with a certain strength, from 0 - 1000 (this command does not require a placement, and also works from thrown things, body attachments, held objects and so on). Use e.g.:
When starts then attract 10
This can be useful for wind blowing from fans, magnets, force fields and much more. When using negative values, or when using "repel" instead of "attract", objects will be pushed away (the following two commands do exactly the same):
When starts then attract -20.5
When starts then repel 20.5
You can optionally use a thing name filter to determine what gets attracted and repelled. For instance, if you just want to attract things which have the word "blue" in them (like "blue marbles" or "thebluemarble"), use:
When starts then attract blue 10
Add the keyword "forward-only" to have the attraction or repelling only be applied in the forward-direction:
When starts then attract blue 10 forward-only
If you don't want people to carry holdables which attract or repel just about any thrown & emitted object in your area, you can disallow the "untargeted attract and repel" right.
... then set run speed/ jump speed/ slidiness
The following lets you set the run speed, jump speed, and slidiness for desktop-mode keyboard movement in your area (the command requires a placement to work). Run speed is when one holds shift while WASD-moving. Jump is the upwards force when pressing the Space key, and Slidiness changes how swiftly one can change velocities when moving:
When starts then set run speed 10.5

When starts then set jump speed 5

When starts then set slidiness 15
Each value can range from 0 to 100. Use the keyword "default" to reset the value back to the default, like
When starts then set run speed default
Please note these commands currently have no effect on VR mode movement.
... then set light
This command sets further light properties (some going beyond values you can normally pick by adjusting a base shape). It can only be used along with the "When starts" event, like:
When starts then set light intensity 20.5

When starts then set light range 20

When starts then set light cone size 40
Intensity can go from 0 - 100 (the default is 12.5).
Range can go from 0 - 10000.
Cone size goes from 0 - 170.
... then set voice
"Set voice" allows you to adjust further text-to-speech properties for the "say" command. This command can only be used along with the "When starts" event, like:
When starts then set voice female 50% 10 pitch 5 speed

When starts then set voice -5 speed

When starts then set voice male

When starts then set voice 50%

When starts then set voice 5 pitch
The available voices are either "male" or "female". Pitch and Speed values are relative, so "10 pitch" would mean +10. Percentages provided refer to the volume, so 50% means "half as loud as normal" (you can use from 0 - 200%, 100% being the default).
Speech output considers the Thing's "Surround Sound" setting.
... then add speed
To add to the velocity of emitted or thrown things, use e.g.:
When starts then add speed 50.5

When touched then add speed 0 50 -10.5
Numbers range from -1000 to 1000. You can use either a single number, or 3 ones in succession to mean x-y-z.
Also see "multiply speed".
... then multiply speed
This lets you multiply the velocity of emitted or thrown things. For instance, to double the speed, you could use:
When starts then multiply speed 2
The maximum number you can use is 1000, and 0 is a full brake. To slow things down to e.g. 10%, you could use:
When told by any speedup then multiply speed 0.1
You can also use 3 values to multiply each of x-y-z:
When touched then multiply speed 0 2.5 -1
Also see "add speed".
... then change head
This command attaches a head to one or several people, and the head may in turn be configured to auto-attach an accompanying body. "Change head" only changes one person's head, while the plural "change heads" applies to everyone in the area at once:
When touched then change head to [drop from inventory]

When touched then change heads to [drop from inventory]
The actual head needs to be dropped from your backpack when you prepare this command. If the Thing's "..." options have "Add current body" ticked for it (or "..." → More → "Add current body, non-clearing"), it will later when worn also attach the currently worn body.
Note this command triggers an Approve/ Undo dialog that automatically opens the mirror for the person whose appearance is changed.
Heads prepared with auto-attaching bodies can also be simply touched in the Inventory to be worn.
A head using "Add current body", where the head is also a direct edit-clone of the head worn while creating it, will in addition adjust its position and rotation appropriately as per the currently worn head.
... then resize nearby
A placement in the area can resize people nearby to a different size using e.g.:
When pointed at then resize nearby to 50%
Percentages may range from 1 to 2500 (note the "%" sign is optional to use). The minimum change to the default size needs to be 10% for this command to take effect.
... then stream
The "stream" command turns the current Thing Part into a camera, and then streams to somewhere, from in-world objects to the desktop window. Use any of the following (for any event, "touched" just being an example, as usual):
When touched then stream to nearest

When touched then stream to [thing name]

When touched then stream to desktop

When touched then stream stop
Note only objects with video surfaces will be considered for streaming onto.
... then say
To have the part speak something (using the operating system's text-to-speech voice), use the "say" command, like:
When looked at then say hello world
Placeholders are supported in your speech text. To adjust the type of speaking voice, use the "set voice" command.
... then write
To change a part's text, use e.g.:
When touched then write this is cool
Placeholders are supported, for instance:
When starts then write [hour]:[minute]:[second]
... then trail
To start a trail, which is a type of line following behind the current part (useful for e.g. 3D pencils to draw into air), use e.g.:
When starts then trail start
Trails always use the current part's materials and colors. You can also define a trail lifetime duration like this (the default is 15 seconds, the maximum is 60):
When starts then trail start with 10s
To use a thick start (lets the line start at its normal width instead of sharply) or a thick end, use:
When starts then trail start with thick-start

When starts then trail start with thick-end
Note these keywords are combinable in the command. To end the trail again, use
When starts then trail end
... then project
The "project" command moves the respective part onto the next surface ahead. For instance, you could build a red dot laser pointer, or have legs reach the ground. Use e.g.
When starts then project
You can adjust the distance percentage between start and the surface ahead (note these setting keywords are combinable):
When starts then project with 100% reach
You can also adjust the maximum distance in meters at which to look for surfaces, from 0.01 - 10000 (the default is 1000):
When starts then project with with 50.5 max
To determine the distance in meters to use when no surface is hit (the default is 0, the maximum is 1000), use:
When starts then project with 1000 default
The following options align the projected part to the surface direction, or away from it:
When starts then project with alignment

When starts then project with counter-alignment
... then reset
The "reset" commands handles resetting of a variety of things.
For a broad area reset that resets states, Thing and area.* variables, deletions, and Movables positions, use the following ("when looked at" being just an example event, any other can be used as well). Note this requires a placement:
When looked at then reset area
The following resets person.* variables of everyone currently here (this also requires the thing containing the command to be placed):
When starts then reset persons
This resets the Thing to its original placement position or rotation, e.g. for Movables:
When starts then reset position

When starts then reset rotation
The following variant removes all of one's attached body parts:
When starts then reset body
To reset the leg attachment sphere positions and the legs they carry to their universal default position and rotation, use:
When touched then reset leg to default
And to reset the legs to the body auto-equipped default position & rotation (this falls back on the universal defaults if unavailable), use the following on body-attached scripts:
When touched then reset leg to body default
... then enable/ disable setting
Use the following to enable or disable settings (note this requires the part using the command to be attached to your body):
When touched then enable microphone

When touched then enable snap angles

When touched then disable show grid
To show e.g. a button glow when a setting is activated, it's best to catch the "When enable/ disable setting" so that the button state keeps in sync with dialog presses and more:
Cell 1
When touched then enable lock angles
When enable setting lock angles then become next in 0.2s

Cell 2
When touched then disable lock angles
When disable setting lock angles then become next in 0.2s
→ This is the full list of available settings with more explanations.
... then turn on/ off/ ...
The "turn" command is used to turn a Thing, Thing Part or Sub-Thing on and off, or to just toggle its visibility or collidability.
The command stats with either just "turn" (relates to the Part), "turn thing" (relates to the whole Thing), or "turn sub-thing [optional sub-thing name]" (relating to this part's Included Sub-Things):
When touched then turn off

When touched then turn thing off

When touched then turn sub-thing off

When touched then turn sub-thing marble off
Use "turn on" and "turn off" to enable/ disable both the visibility and the collidability of the object in one go:
When touched then turn on

When touched then turn off
To only enable/ disable the visibility, or only the collider, use e.g.:
When starts then turn visible

When starts then turn invisible

When starts then turn collidable

When starts then turn uncollidable
The Me dialog's "..." settings "See invisible (as editor)" and "Touch uncollidable (as editor)" can override these behaviors. A thing is also enforced to be collidable when shown in the Inventory, so that one can always grab it.
... then is
The "is" command always relates to handling of variables. For instance, you could keep track of a gold count, and apply a variety of math calculations to it. For instance:
When touched then is gold = gold * 10 + 1
You can then check again for these values using "when is". Note whenever you change a variable value, it will automatically look again in the area for "when is" checks that relate to that variable, triggering them again when qualifying.
All numbers are set to 0 at start. Up to 50 per tick are calculated.
These are the many ways you can handle variables:
| When [some event] then is... | |
|---|---|
| somevalue = 10 * (othervalue + 0.5) | Sets thing value "somevalue" (this persists until everyone leaves). |
| area.somevalue = 10.5 | A math expression to set area number "somevalue" (this persists until everyone leaves). |
| somestate | Sets "somestate" (can be any other name you choose) to be true (which equals 1). |
| not somestate | Sets "somestate" (can be any other name you choose) to be false (which equals 0). |
| person.somevalue = 2 | Sets the value for a person (who has this attached or is closest) in the context of that specific area, e.g. person.gold = 5. Person values are persisting (unless e.g. Anyland is installed on a different computer) and they are guarded to not be read or set by other areas. This means if you set person.gold = 5 in Area A, it won't affect that person's gold in Area B. |
| somevalue = random(min max) | Get a random number between the first and second parameters (inclusive). "Somevalue" is just an example variable name and can be anything. |
| somevalue = randomfloat(min max) | Get a random floating point number between first and second parameters (inclusive). |
| somevalue = absolute(value) | Gets the positive number, e.g. -17.5 turns into 17.5. |
| somevalue = round(value) | Rounds a value to the nearest integer in mathematical fashion, e.g. 5.5 turns into 6. |
| somevalue = floor(value) | Rounds the value down, e.g. 5.8 turns into 5. |
| somevalue = ceil(value) | Rounds the value up, e.g. 5.2 turns into 6. |
| somevalue = smaller(a b) | Gets the smaller of the two number parameters. E.g. smaller(15 10) would return 10. |
| somevalue = larger(a b) | Gets the larger of the two number parameters. E.g. larger(15 10) would return 15. |
| somevalue = sqrt(value) | Returns the square root. |
| somevalue = exp(value) | Returns Euler's number e raised to the specified power. |
| somevalue = sin(value) | Returns the sine of the specified angle. |
| somevalue = cos(value) | Returns the cosine of the specified angle. |
| somevalue = tan(value) | Returns the tangent of the specified angle. |
| somevalue = log(value) | Returns the natural base e logarithm of a number. |
| somevalue = mod(number divider) | Returns the remainder of number divided by divider (a modulo operation). |
| somevalue += [millisecond] - [x] | Uses available placeholder values if they return numbers. |
| somevalue += 2 | Increases the number named "somevalue" by 2. |
| somevalue -= 2 | Decreases the number named "somevalue" by 2. |
| somevalue *= 2 | Multiplies the number named "somevalue" by 2. |
| somevalue /= 2 | Divides the value by 2. Division by 0 is ignored. |
| somevalue++ | Increases the number named "somevalue" by 1. |
| somevalue-- | Decreases the number named "somevalue" by 1. |
Placeholders
The following placeholders can be used in some commands, like for speech output using "say", tell data, and (excluding placeholders returning a string) variables handling.
| [year] | The current year, like "2019". |
|---|---|
| [month] | The current month, like "03" for March. |
| [month unpadded] | The current month but without a leading zero, like "3" for March. |
| [day] | The current date's day number, like "09". |
| [day unpadded] | The current date's day number but without a leading zero, like "9". |
| [hour] | The current Anyland time's hour on the 24 hours clock. |
| [hour 12] | The current Anyland time's hour on the 12 hours clock. |
| [hour unpadded] | The current Anyland time's hour on the 24 hours clock, without a leading zero. |
| [hour 12 unpadded] | The current Anyland time's hour on the 12 hours clock, without a leading zero. |
| [minute] | The current time's minutes. |
| [second] | The current time's seconds. |
| [millisecond] | The current time's milliseconds. |
| [local hour] | Same as [hour], but for one's local time zone's time. |
| [local hour 12] | Same as [hour 12], but for one's local time zone's time. |
| [local hour unpadded] | Same as [hour unpadded], but for one's local time zone's time. |
| [local hour 12 unpadded] | Same as [hour 12 unpadded], but for one's local time zone's time. |
| [person] | The name of the person who has this body part/ wearable or sticky attached. |
| [own person] | One's own name, no matter who's around or who's closer to the object, creating a different view on each client looking at this. |
| [closest person] | The name of the person closest to the object using this placeholder. |
| [thing name] | The name of the Thing using this placeholder. |
| [closest held] | The name of the closest currently held Thing, if any. |
| [people names] | An alphabetically sorted list of all the people currently in the area. |
| [people count] | The number of people currently in the area. |
| [typed] | What was typed using the "t" key shortcut or "show chat keyboard" command |
| [area name] | The name of the current area. |
| [x] | The area position x coordinate of this thing. |
| [y] | The area position y coordinate of this thing. |
| [z] | The area position z coordinate of this thing. |
| [thing values] | Lists all this thing's current variable values (0's may be omitted). |
| [area values] | Lists all area.* variables (0's may be omitted). This placeholder needs placement or editor rights to show its values. |
| [person values] | Lists all person.* variables of the closest person. This placeholder needs placement or editor rights to show its values. |
| [person... values] | Lists everyone's person.* variables of this name. This placeholder needs placement or editor rights to show its values. |
| [... value] | The value of a variable by this name, e.g. [gold value] or [area.lumber value]. |
| [proximity] | The distance in meters to the next thing ahead. For instance, you could make a measuring machine which tells you how far away an object pointed at is. |
Glossary
| Holdable |
An object that can be picked up (even by non-editors of the area, always creating a temporary clone in the hands). Use "..." → "Holdable" (and optionally, "Remains Held") for the Thing to set this. Some commands, like "When triggered" or "When shaken", require the object to be a held Holdable. |
|---|---|
| Movable |
Useful for e.g. board games or playing cards, these objects can be moved in the area. Use the Thing's "..." → "Movable" to set this. Movables reset to their original position once everyone left the area. |
| Thing |
The whole created object and all of its parts. New objects are created by hitting the ring button and "Create Thing". Existing things can be edited again by context-lasering them and picking "Edit" (a new version will be saved upon hitting Done, leaving old placements unaffected). |
| Thing Part |
An individual base shape part of a full Thing creation. You can use up to 1000 Thing Parts per creation. |
| Sub-Thing |
A Thing that is attached as child to a Thing Part. There are Included Sub-Things (default) or Placed Sub-Things (from the area). You can include up to 1000 Sub-Things per Thing, and up to 100 placed Sub-Things. |
| State (Cell) |
States (also called Cells), ranging from 1 to a maximum of 50. Each state can use different positioning, rotation, color, scripts, "call me" names and more. For instance, a cube may be red and small in state 1, and green and big in state 2. Smooth transitioning animations between cells are handled automatically. |
| Clonable |
By default, every object in Anyland can be collected if you come across it in a public area. (You can also search for public objects all across the universe in your backpack's voice/ text search.) In addition, Things which are set to be Clonable in the "..." settings (or where the creator picked Me → "..." → "All my creations are clonable") can be used to edit & inspect, and create new spin-offs. If you ever need help on a specific item of yours, try to make it clonable, then share it in the in-world forums (by dragging it out of your inventory while writing a comment). This way everybody else can check out your code. |
| Base Shape |
One of the multiple shapes you can use to make up your objects. See the Thing Structure reference for a full overview. |
| Placement |
A Thing that's persistently placed in the area (by an editor). Some commands (where noted) require a placement to work, as it guarantees an editor approved their use in the area. |
| Anyland Time |
Anyland Time (also shown at the backside of the main dialog, as well as on in.anyland.com), is a global time which is the same for everyone, useful for coordinating meetups. It's the same as Universal Time (UTC). |
→ Also see the Settings Reference and Optimization Checklist
→ Have Questions, Suggestions & Feedback? Please post in our Steam forum!
This page is in the Public Domain.